Hi!
Let’s make this!
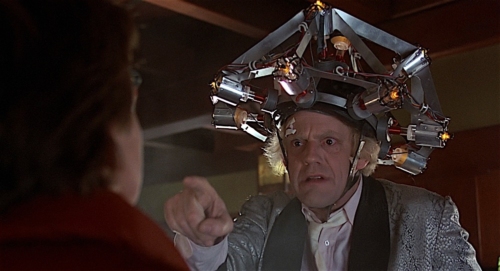
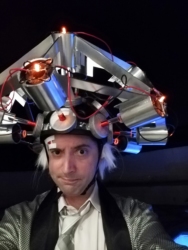
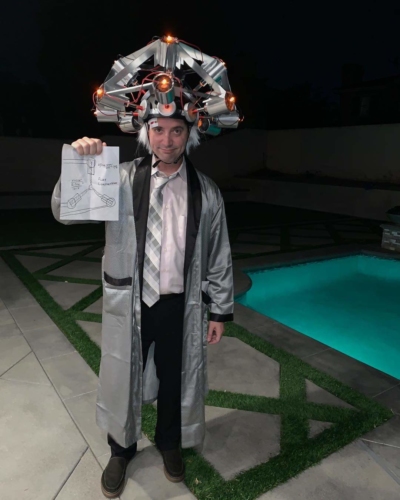
I did it for Halloween this year and I think it came out pretty well!
I’m not the first person on the internet to have had this idea!
While planning and researching the project, I was inspired by this dude, this lady, and this lady. All of their efforts came out great, despite wildly varying materials and methods. You’ll see that my approach borrowed methods from each of them!
While a lot of detail was given in those links, sourcing some of the parts was a challenge. I’m going to try to document here as much of my process as I’m able. You can follow these directions exactly, or you can sort of use it as a base to build on. While I didn’t remember to photograph every step of the process, I can at least talk you through all of it!
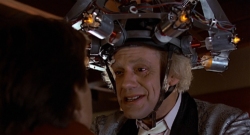
If you’re looking for the ultimate in reference material, you can check out photos of the actual prop taken just before it was sold at auction in 2016 for $70,000. Keep in mind that when it went to auction it was in a complete state of disrepair. Several pieces (including the helmet) were broken or missing, so you can’t put too much faith in the provided measurements (21.5″ x 18.25″ x 11.25″) …but this is your best look at the genuine article!
Parts
1 Pro-Tec Classic Skate Helmet, Matte Black
1 Roll Silver Duck Mirror tape, 0.7″ x 5yd
13 Woodpeckers Wooden Craft Toy Treaded Wheels (2-3/4″ wide x 3/4″ thick)
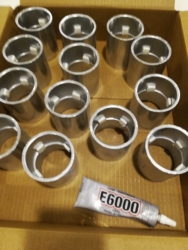
13 2″ PVC couplings
1 24″ x 48″ x 0.118″ sheet of Sintra (or any generic “expanded PVC sheet”) in any color
13 1″ diameter clear lucite rods, cut to 3″ long (purchased from ebay user antori_pancco)
13 1/2″ diameter clear lucite rods, cut to 3″ long (purchased from ebay user antori_pancco)
1 1″ 6ft foam self-seal pipe insulation
1 3yd roll black 12 gauge aluminum “jewelry” wire
3 rolls 20 gauge, 6 yard red craft wire
1 wire jig kit
1 3/16″ thick foam board, maybe 12×12″? Just get it at Michaels or Hobby Lobby.
1 1.5oz tube of SCIGRIP 16 Acrylic Cement
2 2oz tubes of E6000 Industrial Strength Adhesive, clear
1 can Rust-Olum Metallic Spray Paint, Silver
13 5mm Amber LEDs, (2V 20mA)
3 10 ohm resistors 1/4w
1 390 ohm resistor 1/2w
1 25ft roll 16 gauge stranded red wire
1 25ft roll 16 gauge stranded black wire
1 wire stripping tool
2 small wire nuts
1 9V battery case with on/off switch
1 9V battery
1 pack of glue syringes and needles
A 1/2″ drill bit and drill
4 6″ medium trigger clamps (these are essential!)
1 utility knife
1 cheap soldering iron, solder
1 cheap mini glue gun
1 roll of shipping tape
1 Satin Robe as close to screen accurate as you can find
1 white “crazy” wig
Pink dress shirt, black slacks, gray/pink tie
A pair of crazy eyes. I was lucky enough to be born with some.
Overview
We’re building a helmet with stuff on it. That’s the gist.
We’ve got to build 13 individual “posts” and glue them to the helmet. We’ve also got to build 28 individual connecting pieces that look a bit like flying buttresses to connect the posts. Finally, we’ve got to wire the whole thing up with lights.
This is not a weekend project. This is a weeks-long project. The primary adhesive we’re using takes a full 24 hours to set, so be prepared to do just a little work each day.
Helmet Prep
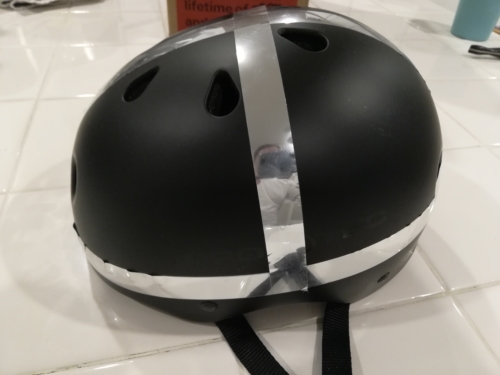
The Pro-Tec Classic Skate Helmet was a great choice. It’s matte black and will be nearly invisible once we’ve attached everything. Apparently they run large – I was able to fit into a medium pretty easily, and I always thought I had a big head!
Take the roll of silver tape and attach three long strips to the helmet. One strip will go around the circumference, one goes from front to back, and one will go from left to right. Use a fabric tape measure (if you’ve got one) to get the “X” on the top as close to equidistant as you can from the circumference strip. Finding the “true” center is really important here, so do your best to get it right.
I first tried to do this using real metal! I started cutting a thin sheet of metal with a jig saw, and it was a complete mess. Metal shavings went flying everywhere, and six inches into my first cut I was like “Ok this is dumb. Why am I even doing this?” I chucked the metal in the trash and never looked back. There is no metal in this build.
Working with Acrylic
I found a guy on ebay selling clear acrylic rods and he was able to custom-cut them to 3″ lengths for me before shipping. You may also be able to find these at a “plastic store” which is apparently a thing. Google for one in your area and be amazed – they exist.
You should have 26 rods 3″ long. 13 should have a diameter of 1/2″ and the other 13 should be 1″.
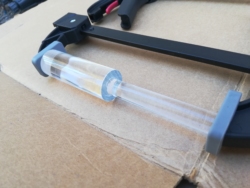
What we need to do is attach one piece of each size together, end to end. We’re going to use “SCIGRIP 16” adhesive. This isn’t just glue. This is a solvent that effectively causes two pieces of plastic to melt into each other and solidify into one piece. It’s also really nasty stuff that you KNOW is giving you cancer once you get even a small whiff of it, so make sure to do this in a well-ventilated area.
Apply a small dot of the SCIGRIP 16 to the end of a 1/2″ rod, press it into the center of a 1″ rod, and clamp it together overnight.
Having a four-pack of clamps makes this go a little faster.
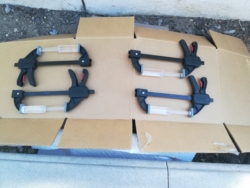
Once you’ve finished 13 of these you can throw away the adhesive – you won’t need it again.
Post Bases
The original prop used wooden dowels wrapped in gray wire at the base of the rods, but that seemed like a crapload of work. I cheated and found a shortcut.
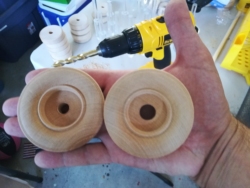
These wooden toy wheels are mostly perfect (they match the diameter of the PVC couplings), but the holes are just a little too small (3/8″) for our lucite rods (1/2″) to fit into.
Go to town on them with a 1/2″ drill bit to make the hole just a little bit bigger. Here’s the before and after.
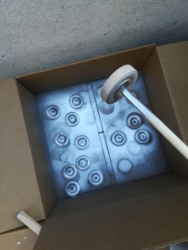
Now it’s time to get these guys painted! Put them in a box or something that will control any overspray.
I used a 1/2″ wooden dowel here to pick up and manipulate a wheel with one hand while my other hand sprayed paint all over it. I didn’t use primer. Note that you really only need to get full paint coverage on the outer edges and the flat face of the wheel. The inner part (where the dowel is here) won’t be visible.
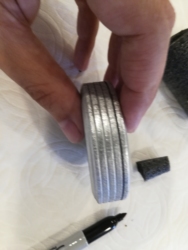
Once your wheels have dried, take a black Sharpie and run it through the grooves to give the appearance of coiled wire (from a distance, anyway)!
Attach The Bases to the Rods
Take three quarters (coins!) and stack them neatly on a table.
Place a bead of E6000 along the entire inside of the hole in the wheels that you previously enlarged.
Now place the wheel on top of the stack of quarters. The flat side of the wheel should be facing UP, and the quarters should be invisible, completely covered by the wheel.
Insert the lucite rod into this hole. It should stop when it hits the coins. Get it as close to “straight up and down” as possible and let it dry overnight. You can add some more E6000 to the base of the rod where it meets the wood once inserted if you think it’s necessary (I did).
The coins act as a temporary spacer while drying so that the rod doesn’t go too far down and hit the table. Because we’ll be attaching this to a curved surface (the helmet) we don’t want the rod to ever touch the helmet – we only want the wheel to do so for maximum adhesion/strength. The coins ensure that the rod will dry in a position where it will never come into contact with the helmet.
I didn’t use the coins myself. In fact, I wasn’t thinking about this particular detail at all. I ended up having to use a Dremel to shave off part of the rods to fix my screwup. Learn from me – use coins.
Coupling Prep
Now it’s time to paint the couplings. This is a two-part/two-day process.
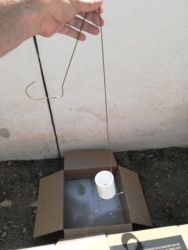
I first hung one on a coat hanger and sprayed the tube all over (again, no primer). The coat hanger trick is a great way to get full coverage without getting your hands all gross. At this point your goal is to spray the entire outside, one of the edges, and some of the inside.
Let that dry overnight.
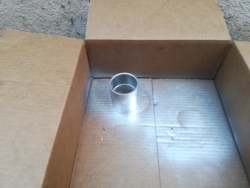
The next day come in and flip them all over.
You’ll now have to spray paint the other edge and as much of the inside as you can. The inside will mainly not be visible, so it’s not the end of the world if you can’t get it all.
Once everything is dry we’re going to build four spacers into the interior of the coupler. In this case I used foam board that was 3/16″ thick, but could have gone thicker. Maybe 4 or 5/16″? I cut 1cm squares out of the foam board, attached each with a dot of E6000 glue, and let them sit overnight.
Wire Coils
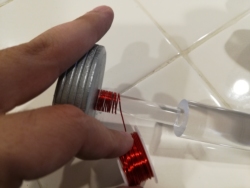
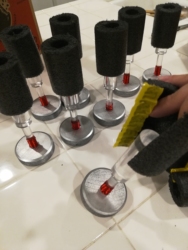
Using only your hands, take the red art wire and begin to wrap it around the base of the lucite rods.
Once you’ve got it wrapped up the rod about an inch or so, snip it off of the roll. (For reference, I was able to get about 8 rods wrapped with each 6 yard coil of wire.)
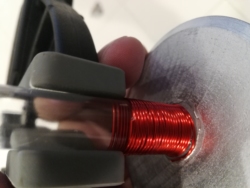
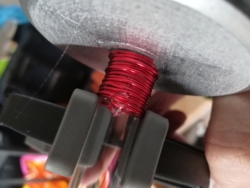
It will now expand like a spring and look terrible. So what you’ll want to do is push it down and clamp it so that it looks tightly coiled like this:
Now that you’ve got it right where you want it, swoop in with a small blob of E6000 adhesive right where you snipped the wire. You do *not* need to put any glue on the end of the coil where it meets the base.
Let that sit overnight, clamped and drying.
Filling the Couplings
If you’ve got a miter box, you can make very easy and clean cuts in the foam pipe insulation in just a stroke or two, however you can probably do it with just a pair of really sharp large scissors.
Cut the foam pieces to be just a tiny bit shorter than the pieces of coupling. (They shouldn’t extend outside beyond the PVC at all.)
Now wrap the top of each post with the insulation, pulling off the strips to expose the adhesive ends. Once those are sealed, you should be able to slide them up and down the rods a bit – they won’t be glued to the rods – friction will hold them in.
I had originally planned to use expanding insulation spray foam sealant to attach these rods to the PVC couplers, but that turned out to be a terrible idea. Here’s a photo of a wooden mockup I used in an early test.
You can pretty clearly see that even with a long applicator tip, this foam is completely unsuited for such a precise application. That’s how I ended up with the foam board spacers solution.
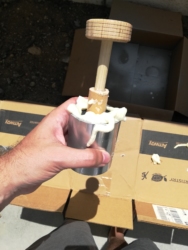
Next, stand your couplings on their ends and insert your foam insulation/rod combos into each one from above.
Fill a glue syringe with E6000, attach the longest applicator you can, and insert it between each foam board spacer and black insulating foam. Squeeze a dot or two between each one, make sure your rods are as on-center as possible, and let them all dry overnight.
In the morning you should be able to place one hand on the wood end and one hand on the PVC end, and slide them together/apart without breaking anything.
The ideal end-to-end length we’re going for here is a uniform 7″ across all rods.
Wire Stars
At the tips of the couplers we’re going to attach some black wire “stars” that will add some visual variety as well as give our LEDs something to adhere to. Yes, Doc’s helmet actually had these. No, I never noticed either.
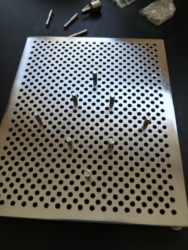
Bust out the wire jig kit and put eight pegs in these holes:
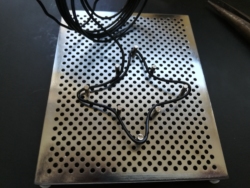
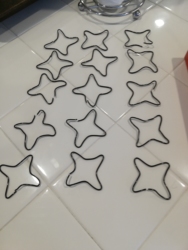
Now wrap your black jewelry wire around the pegs, mostly like this…You’ll see one corner popped out here when I took the photo, but I made sure to fix that.
Once you’ve got this shape completed, snip the wire at the end, and close the shape with a dot of hot glue.
I was able to make 15 of these with a single 3 yard coil of wire. I think. Maybe I had two coils? Can’t remember. Here they are, pre-glue.
Now we’re done with a whole lot of prep work and it’s time to start actually connecting things to the helmet!
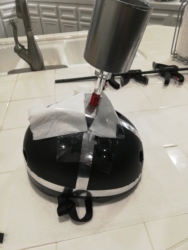
Apply a thick bead of E6000 all the way around the wooden base of your post – one big circle. Find the top intersection of silver tape on your helmet, and very carefully push it into place.
Because E6000 isn’t an instant drying glue, you’re going to have to hold this in place for hours. Clamps don’t really work here, so I used two long pieces of clear shipping tape, pulled very tightly across the wooden base.
You’ll notice that I also put paper towels between the tape and the painted wood. I was afraid that the tape would take the paint off a day later when it was removed. This solution allows it to keep pressure on the wood without any risk of damage and it worked perfectly.
I would strongly recommend that you prepare your two strips of tape (with paper towels pre-attached) *before* you ever try to attach the adhesive. Keep them within arm’s reach and you’ll be able to get this done within minimal trouble.
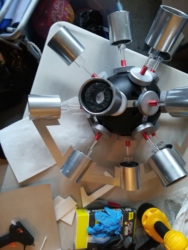
At this point you’re just sort of going through the motions. Use clamps when you can, tape when you can’t, and spend a couple days waiting for various parts to dry.
Your placement of these posts is crucial. Always try to get the wooden wheels to be as flat as possible against the helmet, and always make sure you’re as close to on-center on your silver tape strips as you can manage.
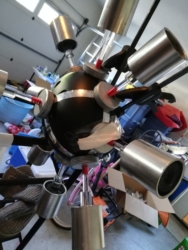
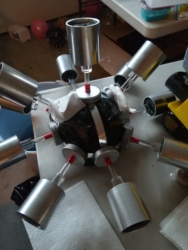
You’re basically building up three “levels” of rods here.
There are eight that go along the lowest level, all radiating outward from the metal tape ring running along the circumference.
There are four that form a type of crown just one layer above that.
There is one that sticks straight up from the center, and is the first one we attached.
Support Arms
You’re now going to cut pieces of what’s called an “expanded PVC sheet”, or basically a flat sheet of PVC plastic. It goes by many different brand names: Sintra, Komatex, Celtec, and probably others. As far as I can tell, these are basically all the same product.
Confusingly, expanded PVC isn’t sold at Home Depot or at craft stores. In fact, it’s remarkably difficult to find at retail at all. I ended up paying too much for far more than I needed with a seller on Amazon (Prime shipping not available, of course). Cosplayers use it to build nerd armor and other things, so it’s kind of strange that you can’t just pick it up at Michael’s or Hobby Lobby or wherever. Anyway. Internet to the rescue.
I used Sintra that was 0.118″ thick. This is supposed to be approximately 3mm, but when I measured it looked a whole lot like 4mm to my eyes. I could have maybe gone down in thickness to whatever the next size was.
You’ll need to cut 28 individual support arms out of Sintra, all of which are completely custom sized to fit the spaces between your PVC rods. This will be the hardest, longest part of the entire operation. Your arm will twinge all the way up to your shoulder. Your fingers will hurt for days. Just be prepared.
You can use a fabric ruler or a compass to measure the distance between the PVC couplings. Take one measurement at the widest end and one at the narrowest end, and cut your Sintra to match. Do this 28 times.
Start with a 2 1/2″ strip of Sintra. All of your arms will be this wide.
To cut Sintra, take a utility knife and lightly score it in a straight line. If you have a metal ruler this will help you to stay straight, but you may find that it’s pretty easy to follow a pencil line with just a knife and your eyes alone – the material holds the blade pretty well in place.
Repeat the cut, pushing a little deeper along the first score line. It may take you as many as 10 times (or more!) to cut all the way through. This takes forever and it sucks. Make sure to keep a sheet of cardboard (or two) underneath so you don’t ruin your work table.
Once your trapezoid is cut, hold it between the two rods you want to connect to check for proper fit/size. You’ll almost never get it right on the first try, and you’ll need to make small cuts here and there to make it fit.
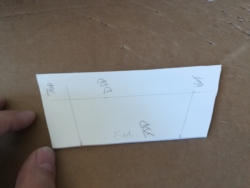
As you finish each one, make sure you write its location and its orientation on each piece (and on a piece of paper!) so you’ll know where to attach them later.
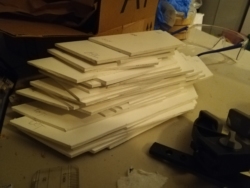
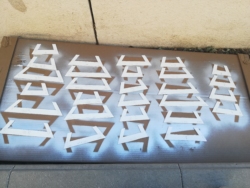
At the end of the process, you’ll have this!
Aren’t they beautiful? At this point I had about 30% of feeling remaining in my pointer finger. Pressing so long and hard on the utility knife had done some internal damage that lasted about three days.
BUT WAIT. We’re not even close to done with these arms.
Shaping the Support Arms
We still need to take out a chunk of the support arms. The ends are long, but the main part of the beams should be narrow.
You might think “Maaan, I’ve got a jig saw. Why can’t I just use that?” Well, I tried. When you use a jigsaw on Sintra, PVC flies everywhere in a fine mist, and larger chunks that act like mini styrofoam packing peanuts get all over the place.
Jig saws are also pretty big, and it’s really hard to clamp pieces this small to make effective cuts. So it’s back to the utility knife! Sorry, buddy. The good news is that the utility knife method allows you to get remarkably straight cuts just about every time.
For the horizontal line, measure 1″ down from the long edge. Along the shorter edge, mark 3/4″ in from either side. Eyeball it and draw two lines that roughly match the angle of the side edges.
Now you’ll need to make a C-shaped cut. In the movie these internal cuts are actually curved, not hard angles. I tried and just couldn’t make that work. It was too hard to cut this stuff with the tools that I had. And guess what? Nobody cares. Nobody who sees this will know or care. Get over yourself.
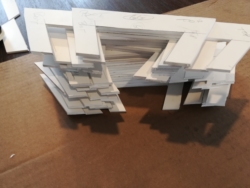
After hours of more pain you’ll end up with these!
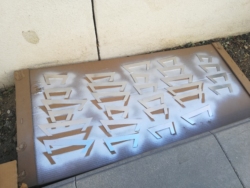
Lay your pieces flat, label sides down, and spray ’em.
Let them dry, then flip them over.
This is the last time you’ll see your labels, so before you paint the other side make sure to take a photo. You’ll refer back to that photo when attaching these.
When spraying, don’t forget to make certain the thin outer edges are covered in paint as well.
Connecting the Arms
Well, here we are. The time has come to connect the support arms to the rods.
My thinking at this point was that the support arms were decorative, not structural, so E6000 was probably overkill and more trouble than it was worth for attaching these.
Soooo for this part I used a hot glue gun. It sets up in like 10 seconds!
As it happens, hot glue would turn out to be a terrible choice for this step. All I had to do was hug someone a little too closely or walk too near a wall and these arms would pop right off with just the slightest pressure.
I’d recommend using a small dot of hot glue on both ends to hold these in place initially, and then once that’s dried run a full bead of E6000 down the entire length of the seams.
Be conservative with E6000 – if you use too much or it starts to drip, it will strip off the silver spray paint. It’s very strong glue and you don’t need a lot. Use a syringe if you want more control over where it goes.
LED Array
To keep your LEDs burning bright and efficiently all night long, you’ll need to wire them in an array. This cool calculator will print out a wiring diagram for you to refer back to.
The values you need to enter (based on the parts list above) are:
Source Voltage: 9 (the battery is 9v)
Diode forward voltage: 2.2 (even though we ordered 2V LEDs, the package says “2.0-2.2V”)
Diode forward current (mA): 20
Number of LEDs in your array: 13
Here’s a screenshot of the wiring diagram I used in case the calculator goes down some day:
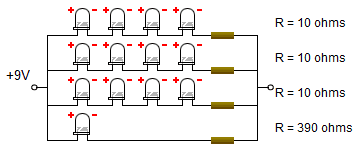
Three basic electronics things to know: Polarity matters, the longer side of the LED is the positive side, and resistors don’t have a +/- side.
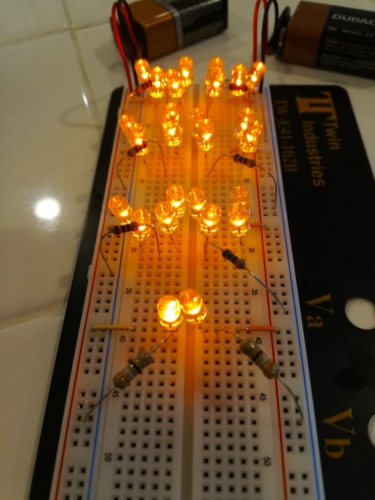
I used a breadboard to test this out before I did anything (twice) and it worked fine! I ran it overnight for 12 hours, and in the morning it was only a little bit dimmer than when I had started. Conclusion- You will definitely not need to pack a spare battery for whatever Halloween party you’re going to.
The Stars and the Lights
Use one small dot of hot glue to attach one corner of the black wire stars to the end of your PVC couplers. Use E6000 on the other three corners. Let that dry overnight.
Now learn how to solder. Anyone can do this part and it doesn’t matter how good or bad it looks. Cut wires long enough to reach to the center of your couplers after looping around a wing one time. Alternate between black and red colors. Get creative with your wire placement here and just make it look nuts.
Once you’ve got good lengths, strip the ends of the wires. I strongly recommend a tool like the wire stripper in the parts list above. It will strip any wire in half a second with just one squeeze, saving you a lot of time and energy.
Now bust out the soldering iron and start connecting everything. You’ll have four positive lines and four negative lines, and you should work to make certain that those ends all end up in the same general part of the helmet so that you can connect them together.
Use the wiring diagram!
Group up the four ends of the resistors and insert them into a wire nut with the black wire from the 9V battery case. Twist them tight and wrap it up with black electrical tape. Do the same with the remaining four wires and the red wire from the battery. Flick the power switch on. Are all the lights on? Great! Are they not? Check your wiring.
Using E6000, attach the LEDs to the black wire stars all over the thing. Use a little electrical tape to hold them in place temporarily while they dry. Try to only put the tape on the wire stars if you can – it will remove a small bit of the silver spray paint if it touches it.
Attach the battery case to the helmet with hot glue somewhere near the back in a spot where you can easily reach the power switch.
The helmet is now *almost* done.
The Wig
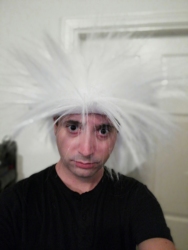
The white wig I had was too big to fit under the helmet. It was just too big…period.
I mean really.
I ended up cutting a narrow strip of hair off the back/bottom edge of the wig and hot-gluing it to the interior plastic edge of the helmet. I trimmed it with scissors lightly to make it look a little crazy, and also match the length of Doc Brown’s 1955 hair, which was really just about an inch or two below his ears.
Note that his hair is slightly yellow in 1955. All the yellow wigs I found were like Big Bird yellow and would have looked ridiculous, so I just played it safe and stuck with white.
Ok, NOW the helmet is done. But the costume isn’t.
Accessories
For the bandage I cut a 2″x1″ square of gauze, marked it up with red Sharpie, and attached it with strips of 0.5″ wide white bandage tape.
The robe was close-ish to Doc’s but was the best I could find.
Any pink dress shirt will do, unbuttoned at the collar.
The pattern on Doc’s tie is very specific and impossible to match, but any silver or pink tie with a diagonal element should be fine. Doc prefers the very tacky and lazy half-windsor knot, which maybe was the style in 1955.
Any black slacks and shoes will do because those are never really shown very well in the film.
If you want to show people what you drew when you hit your head on the toilet, then this dude has got you covered.
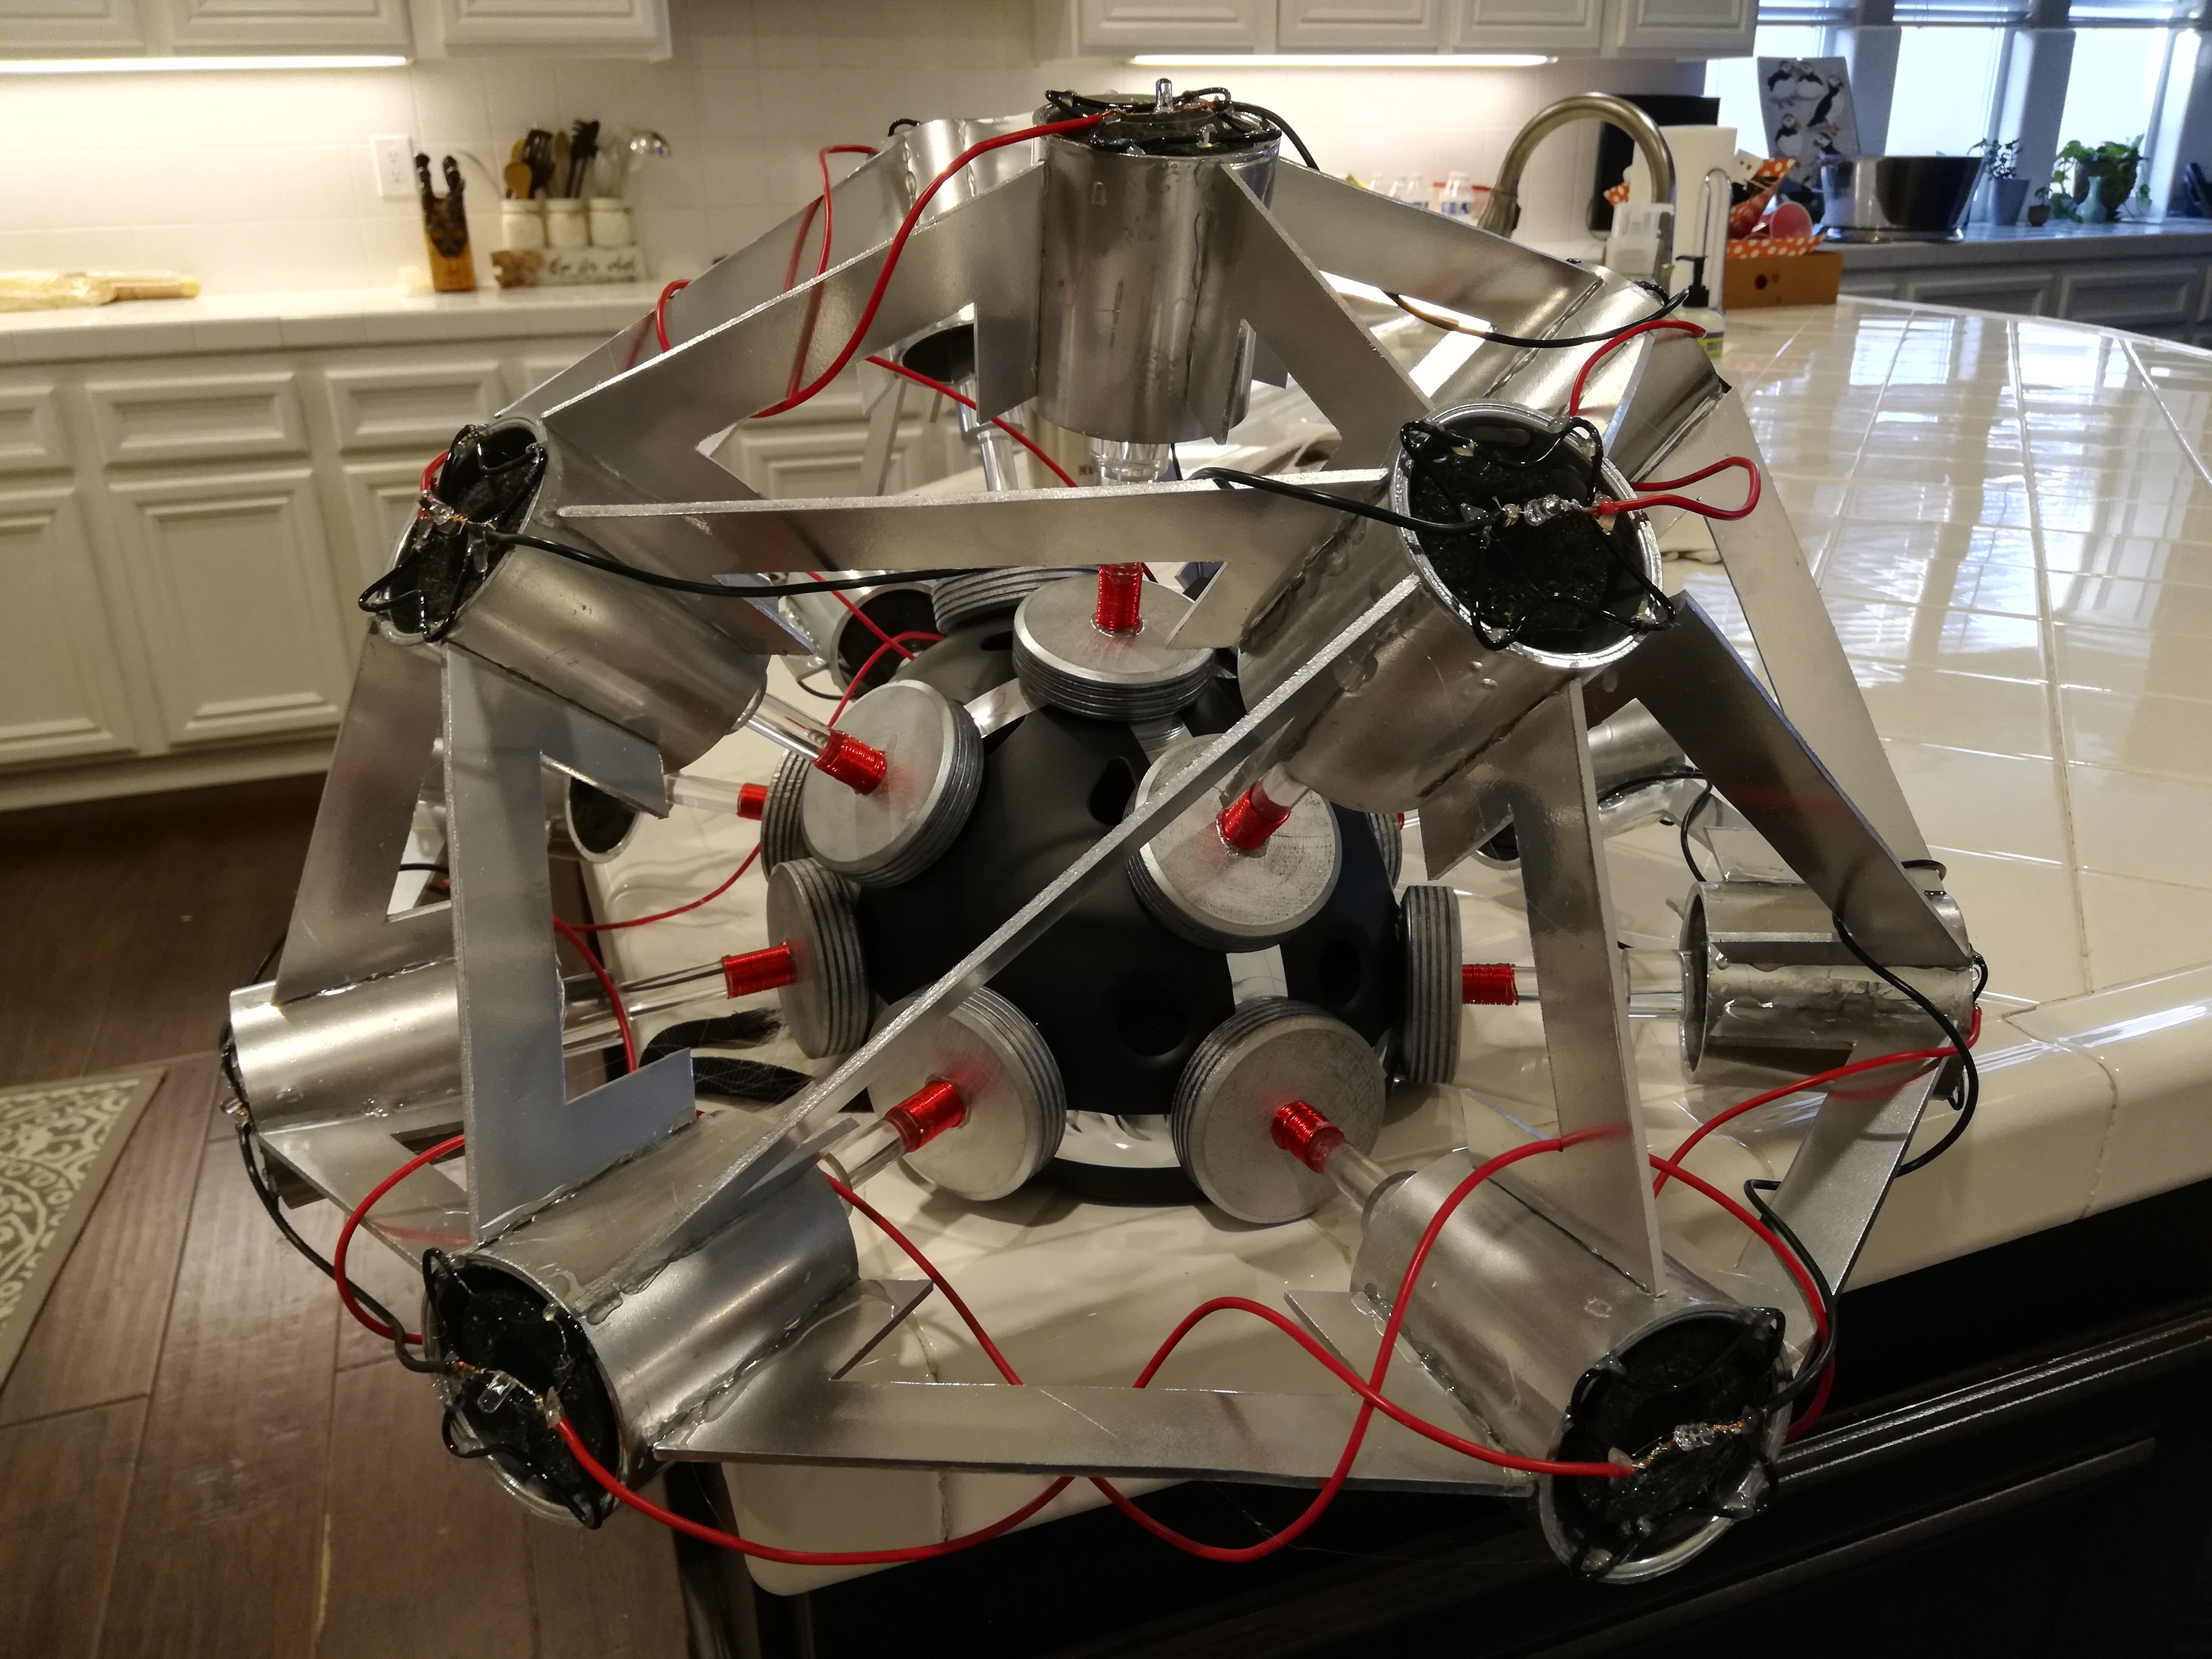
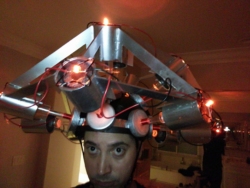
The Final Product
Thanks for playing! Post a photo in the comments if you end up making this!


Long time no post!
I hope it wasn’t too much “vomit” and a bit of “Tron” in the past 24 mo this 🙂
Cheerio from a reader passing by occasionally…
Marco